Developing NES Games on Raspberry Pi
This is a log of how I set up a NES development environment on a raspberry pi. It’s not intended to teach you 6502 assembly, game development, or anything else besides perhaps being an endurance workout for attention spans.
Table of contents
- Why I did this
- Hardware used
- Software setup
- Text editor
- Graphics editor
- Emulating x86 on aarch64 with box to allow non native apps to run
- Audio editor
- Emulator
Why
It has been a hot summer here in Queensland, Australia. My normal desktop computer only adds to the temperature, converting kilowatts into heat. I decided to see what I could achieve on a smaller, single-board computer as a way to reduce the amount of power used and heat produced, but also just to see how much of a retro videogame studio I could squeeze onto one single board computer.
The hardware
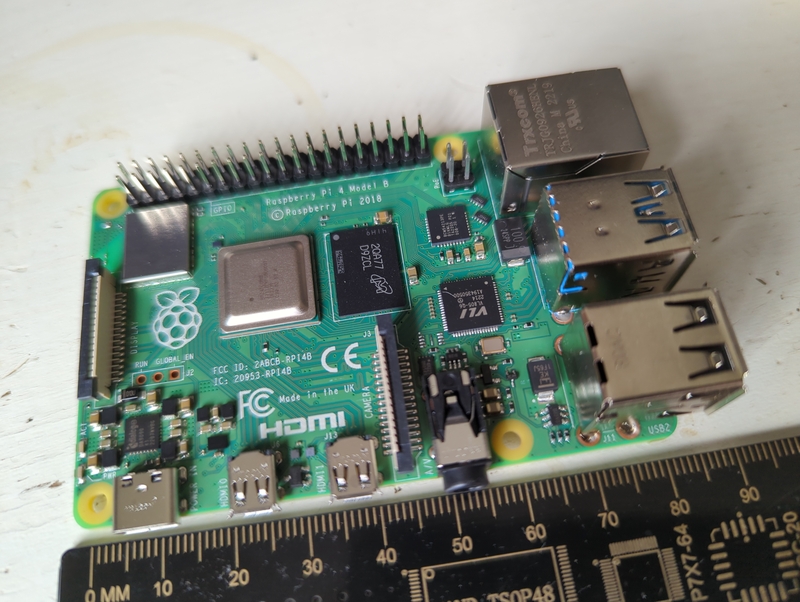
I’m using a Raspberry Pi 4 with 8GB of RAM. This is overkill for the NES setup described here, but is useful for other development work. Also it was the first model that became available, there’s a global shortage of single board computers at the time of writing.

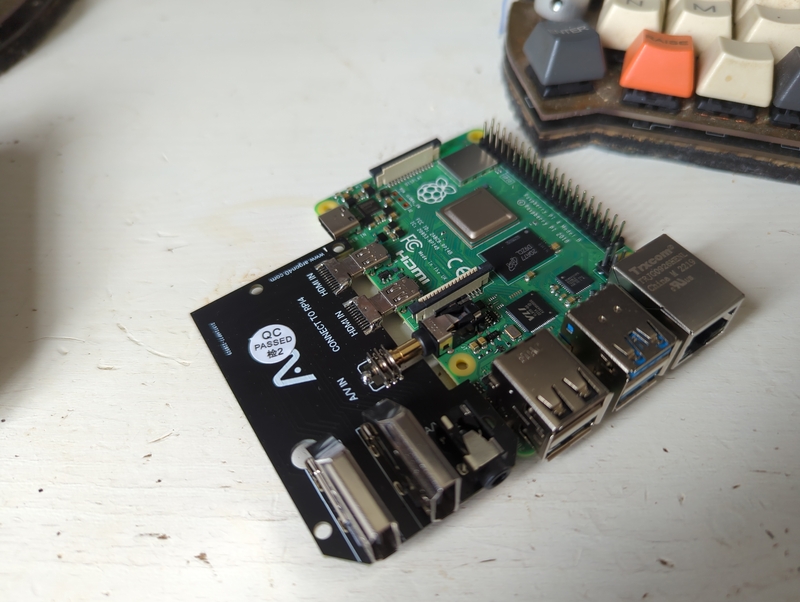
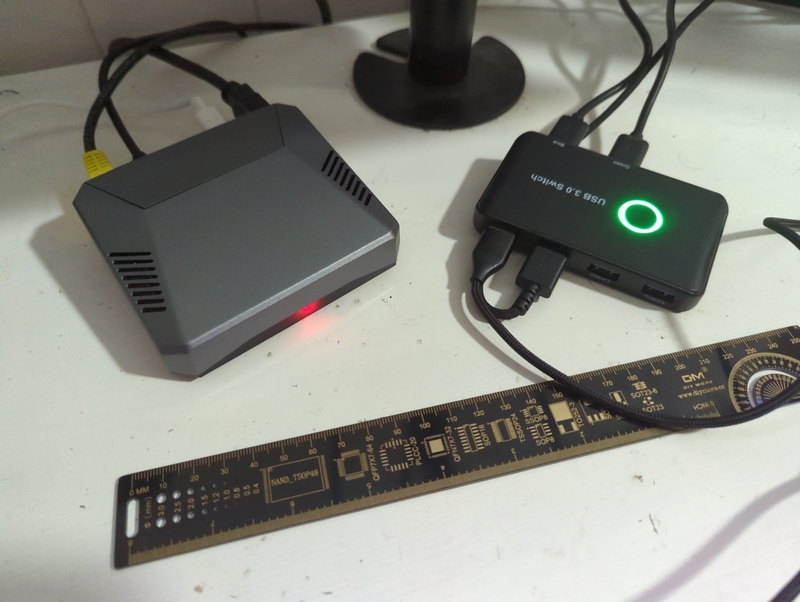
Because this is going to be sitting on my desk, it needs a protective case. The bundle I bought came with an ‘Argon One’ case, which also upgrades the mini-hdmi ports to full size hdmi via a daughterboard that plugs into the Pi.
I also grabbed a USB switcher to let me share my mouse and keyboard between the Pi and my desktop, for personal laziness and to reduce wear on the Pi USB ports.
Operating system
Nothing unusual here, I installed the official 64bit version of ‘RasperryPi OS’, which is Debian with some tweaks specific for the Raspberry Pi. The entire OS is written to a 32GB microSD card that slots into the underside of the Raspi case, and runs directly from there. This is the weakest part of the setup: microSDs are generally much slower than ‘real’ harddrives, and are quite susceptible to corruption if the Raspi is powered down unexpectedly, during a powercut or a child flicking the power switch.
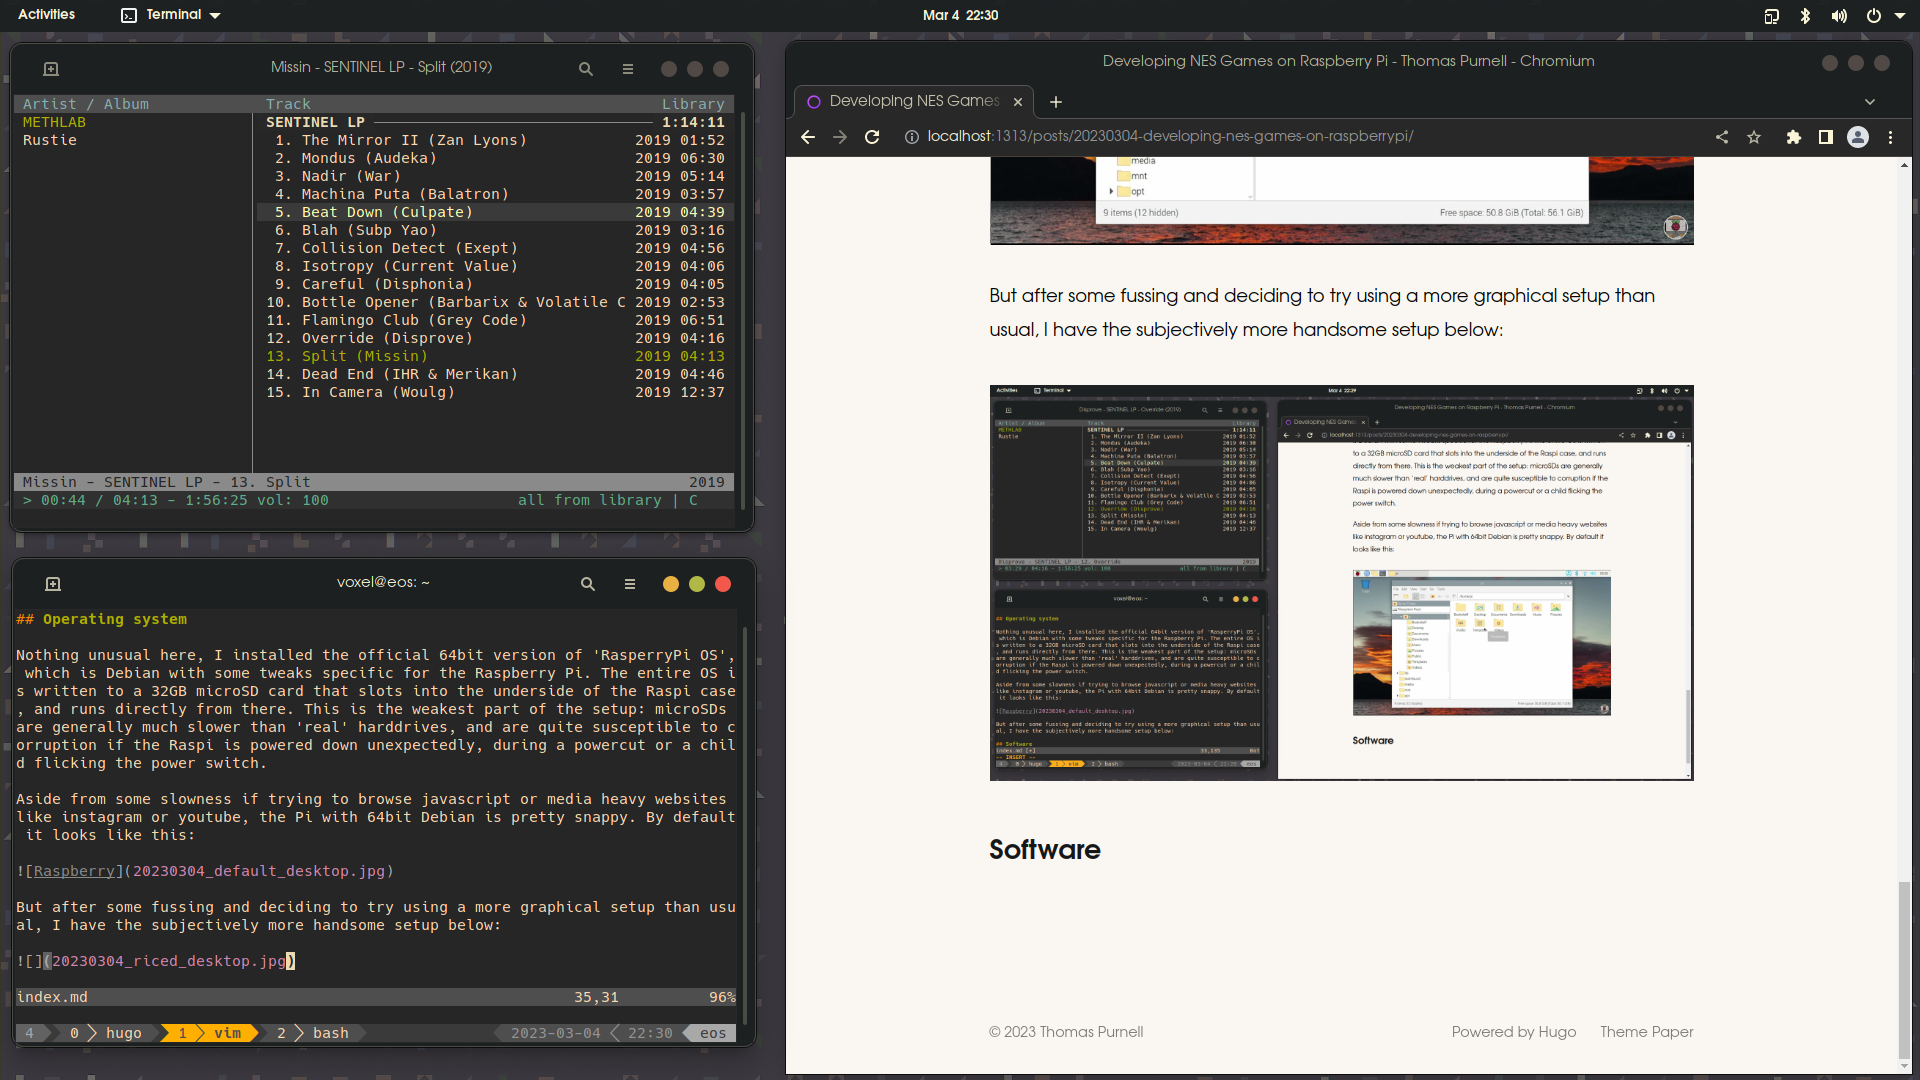
Aside from some slowness if trying to browse javascript or media heavy websites like instagram or youtube, the Pi with 64bit Debian is pretty snappy. By default it looks like this:

But after some fussing and deciding to try using a more graphical setup than usual, I have the subjectively more handsome setup below:
Software
To make NES games, the following is needed:
- A text editor, to write the code,
- An assembler, to convert 6502 assembly to machine instructions,
- A graphics editor, to draw the visual elements of the game. This can be done on paper and bytecode manually calculated, but I’d rather have the computer do that for me.
- An audio editor, for creating sound effects and music. Again this can be done manually but it’s a lot easier with some good tools.
- An emulator to test the game, preferably with a good debugger.
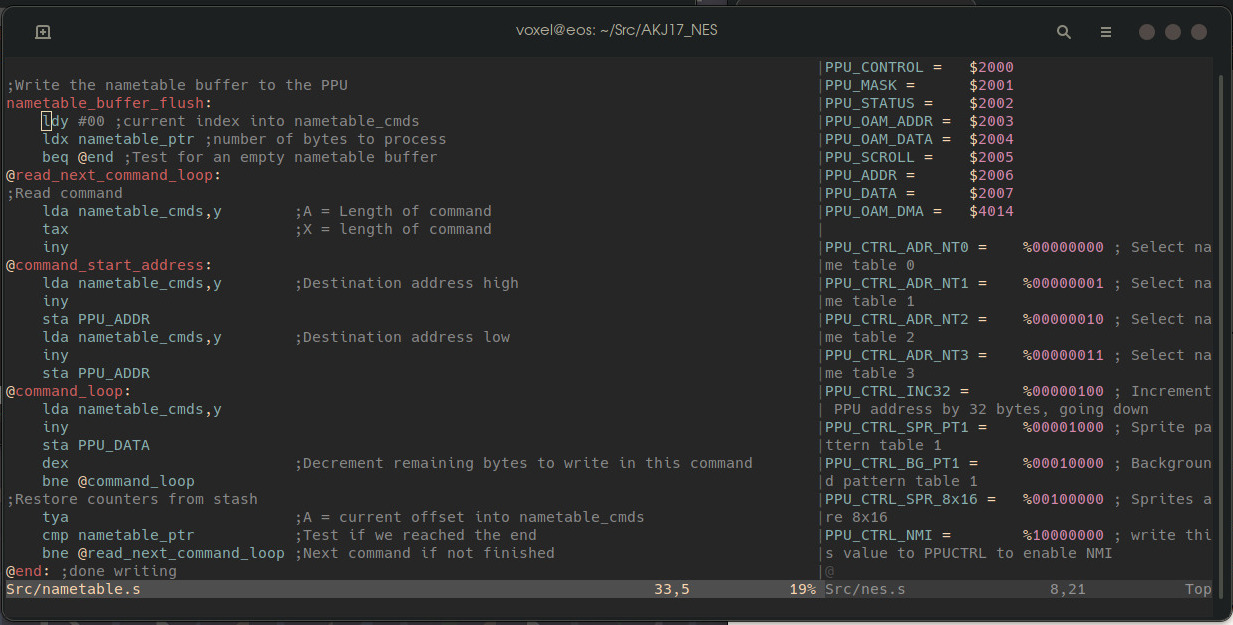
Text editor
You can use whatever editor you like, but I’m using vim. VSCODE (or its free and open source alternative ‘CODE’) are also great choices that I’ve experimented with. 6502 Syntax highlighting is probably available for many programming focused editors.
![Vim, everyones favourite text editor and escape room challenge] (https://thomaspurnell.com/media/posts/1/20230304_vim.jpg =1233x625)
Assembler
The cc65 suite does everything I want and is actively maintained. I’m not sure there’s a great deal of difference between the assemblers beyond some syntax differences. cc65 is available directly from the Debian repositories for aarch64 platform that the Raspberry Pi uses in 64bit mode, so no problems here.
Graphics Editor
This is where things start to get a little more tricky. It’s possible to use any art package, photoshop, aseprite, grafx2, even MS PAINT.EXE and run the output through a converter to NES CHR (character graphics) data, and this probably path I’d need to take if I were working with an artist unfamiliar with NES technical issues. But things change in the conversion process and you might not have as much control as you’d like, so we can make life easier by using a dedicated NES graphics editing tool. At the time of writing, frankengfx’s NEXXT is version 0.22.0 but already includes more functionality than I could need. It lets you draw and edit tiles, place those tiles into tilemaps (i.e to draw part of a level or a title screen), all while seeing how the graphics will actually appear on the NES when palette limitations apply.

The only problem is that is windows only. “But you can just run it through WINE!” I hear you cry. No child, it is not so simple. Wine is not an emulator, it can run windows applications outside of windows, but it can’t convert x86 to ARM aarch64. You could run aarch64 windows applications through wine (if any exist?), but not nexxt, which is a 32bit x86 app. So why am I talking about nexxt still? Well, it turns out that with some help wine can run nexxt.
Detour: installing wine with box64 and box86
Unlike wine, box64 and box86 are emulators. They can run x64 and x86 linux programs on non x86 linux systems, respectively. Following this guide carefully will result in a special wine configuration that can run nexxt and let us draw all the little NES pixels we like on a 64bit raspberry pi!
# Lifted directly from https://ptitseb.github.io/box86/X86WINE.html, best to check there for updates
# Backup any old wine installations
sudo mv ~/wine ~/wine-old
sudo mv ~/.wine ~/.wine-old
sudo mv /usr/local/bin/wine /usr/local/bin/wine-old
sudo mv /usr/local/bin/wineboot /usr/local/bin/wineboot-old
sudo mv /usr/local/bin/winecfg /usr/local/bin/winecfg-old
sudo mv /usr/local/bin/wineserver /usr/local/bin/wineserver-old
# Download, extract wine, and install wine (last I checked, the Twister OS FAQ page had Wine 5.13-devel)
wget https://twisteros.com/wine.tgz -O ~/wine.tgz
tar -xzvf ~/wine.tgz
rm ~/wine.tgz # clean up

# Install shortcuts (make launcher & symlinks. Credits: grayduck, Botspot)                     echo -e '#!/bin/bash\nsetarch linux32 -L '"$HOME/wine/bin/wine "'"$#"' | sudo tee -a /usr/local/bin/wine >/dev/null # Create a script to launch wine programs as 32bit only
#sudo ln -s ~/wine/bin/wine /usr/local/bin/wine # You could aslo just make a symlink, but box86 only works for 32bit apps at the moment
sudo ln -s ~/wine/bin/wineboot /usr/local/bin/wineboot
sudo ln -s ~/wine/bin/winecfg /usr/local/bin/winecfg
sudo ln -s ~/wine/bin/wineserver /usr/local/bin/wineserver
sudo chmod +x /usr/local/bin/wine /usr/local/bin/wineboot /usr/local/bin/winecfg /usr/local/bin/wineserver

# Boot wine (make fresh wineprefix in ~/.wine )
wine wineboot
Finally, nexxt can be launched via $ wine NEXXT.exe, and it will be emulated via box. Initial loading can take a few extra seconds, but performance during use is indistinguishable from running on native Windows.
Audio Editor
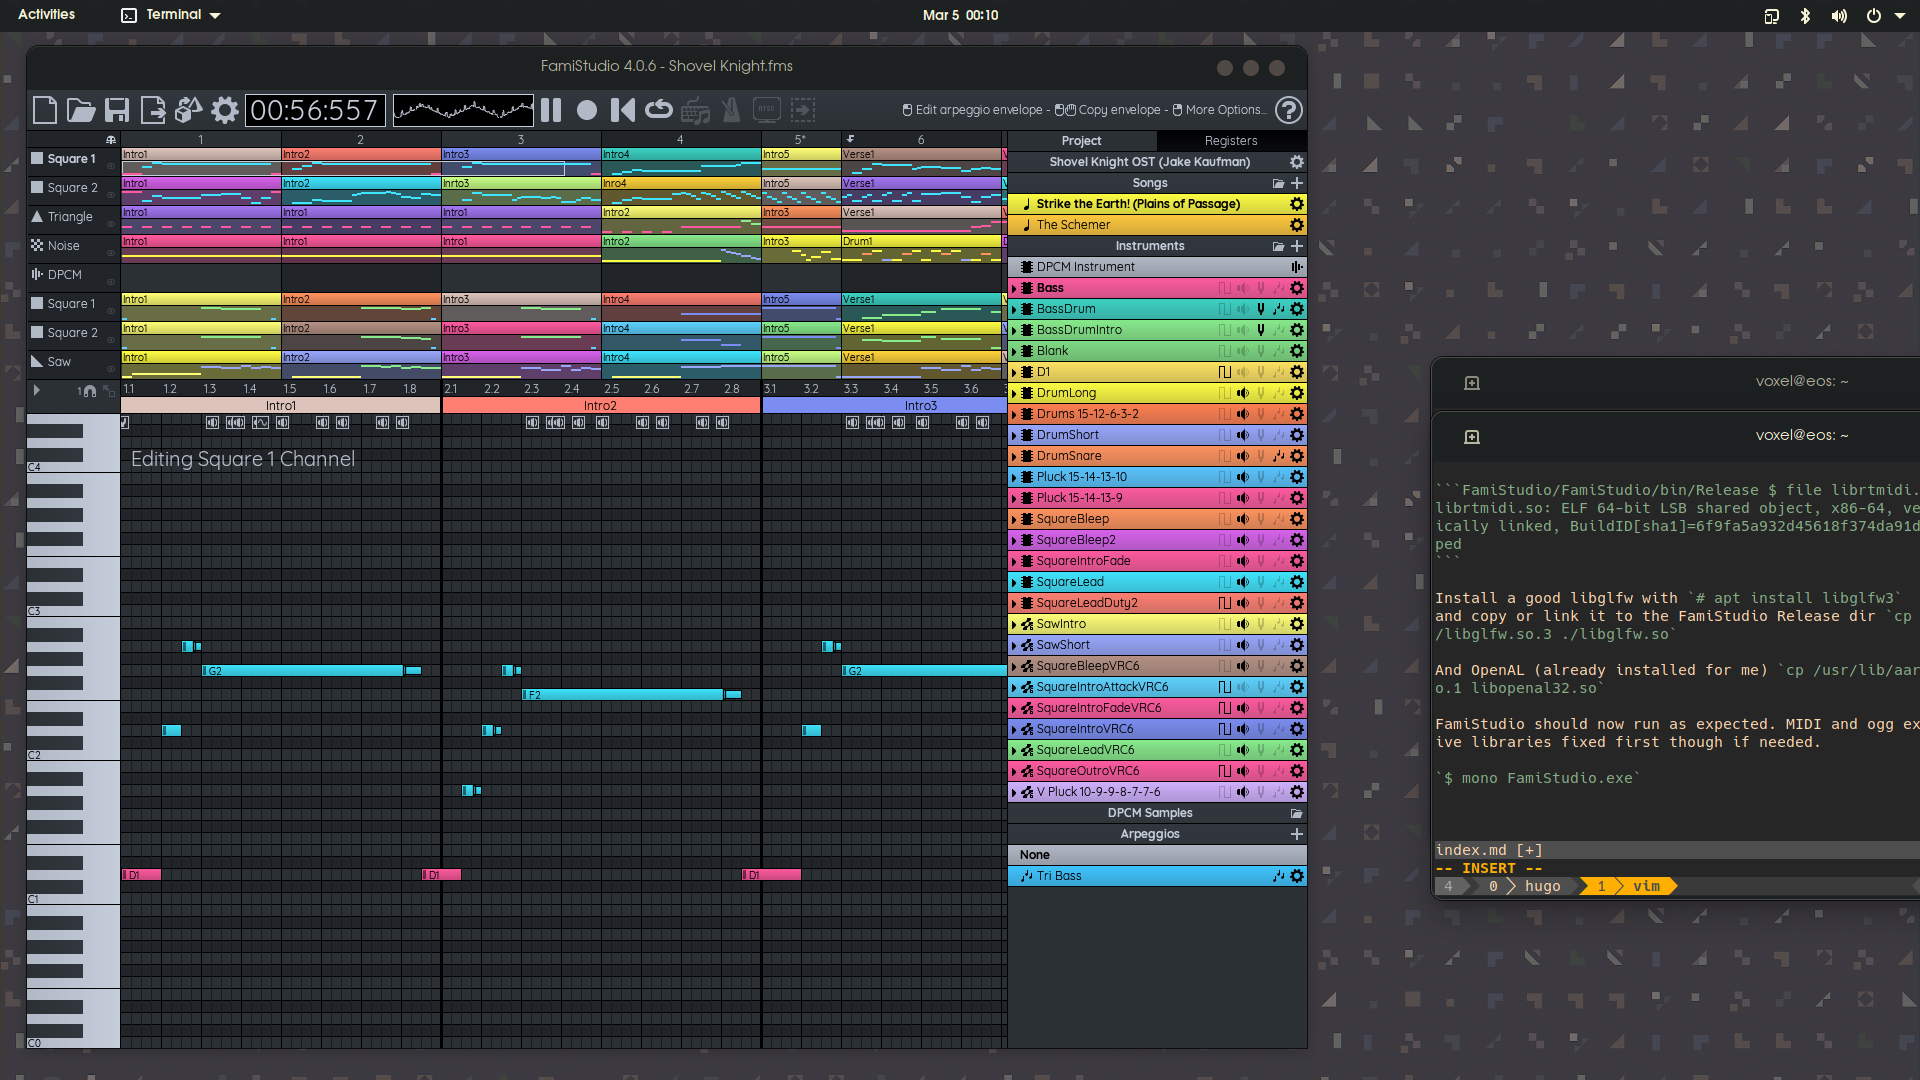
The sensible choice here is to run one of the various forks of famitracker. However, if you have read this far you will realise we are going to get the newest, shiniest Music and SFX tool for the NES, which is the amazing famistudio.
This is a mono app, which means that it can in theory run anywhere the mono runtime has been ported. Later on I’ll be using dotnet, which should really be able to run any given mono app, but it isn’t the case for the .net 4.x family of runtimes. I don’t know why either.
At the time of writing the stable Debian mono packages are too old to build Famistudio, so we follow the official mono guide to add their repository containing the newer mono builds.
sudo apt install apt-transport-https dirmngr gnupg ca-certificates
sudo apt-key adv --keyserver hkp://keyserver.ubuntu.com:80 --recv-keys 3FA7E0328081BFF6A14DA29AA6A19B38D3D831EF
echo "deb https://download.mono-project.com/repo/debian stable-buster main" | sudo tee /etc/apt/sources.list.d/mono-official-stable.list
sudo apt update
$ apt install mono-complete now gets the newer mono tools installed.$ git clone https://github.com/BleuBleu/FamiStudio gets us the FamiStudio source.
FamiStudio needs a few native libraries to build and run successfully. Build scripts are included for some.
$ cd FamiStudio/ThirdParty/NesSndEmu; ./build_linux.sh; cd -
$ cd FamiStudio/ThirdParty/GifDec; ./build_linux.sh; cd -
$ cd FamiStudio/ThirdParty/NotSoFatso; ./build_linux.sh; cd -
$ cd FamiStudio/ThirdParty/ShineMp3; ./build_linux.sh; cd -
# apt install libvorbis-dev
$ cd FamiStudio/ThirdParty/Vorbis; ./build_linux.sh; cd -
Then build FamiStudio itself from the FamiStudio directory.$ msbuild /p:Configuration=Release FamiStudio.Linux.sln
Famistudio was built in FamiStudio/FamiStudio/bin/Release, but the bundled versions of some libs are x86-64 and not aarch64, e.g:
librtmidi.so: ELF 64-bit LSB shared object, x86-64, version 1 (GNU/Linux), dynamically linked, BuildID[sha1]=6f9fa5a932d45618f374da91dc71adbd1b85b3b9, not stripped
Install a good libglfw with # apt install libglfw3
and copy or link it to the FamiStudio Release dir cp /usr/lib/aarch64-linux-gnu/libglfw.so.3 ./libglfw.so
And OpenAL (already installed for me) cp /usr/lib/aarch64-linux-gnu/libopenal.so.1 libopenal32.so
FamiStudio should now run as expected. MIDI and ogg export will need the respective libraries fixed first though if needed.
$ mono FamiStudio.exe
Unfortunately the demo songs aren’t included in the source release but can easily be grabbed from one of the zipped binary distributions on the FamiStudio website.
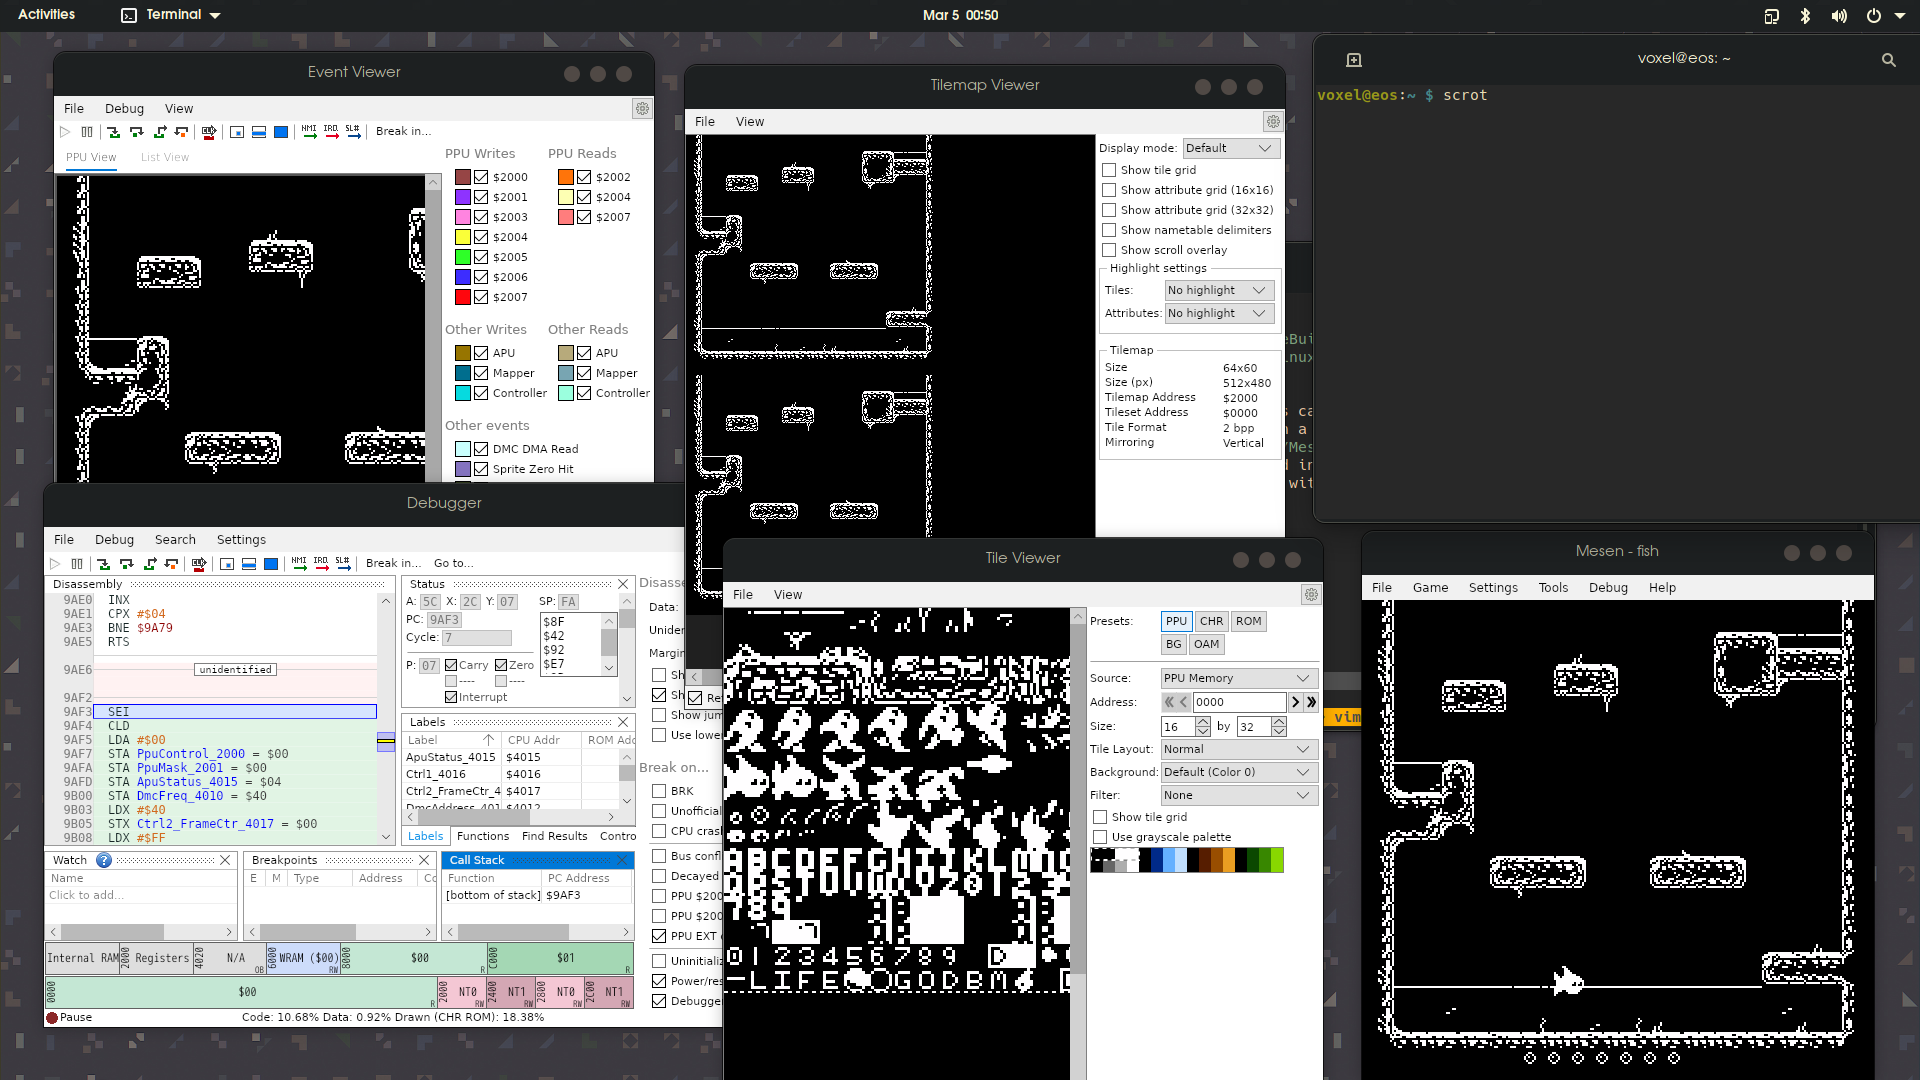
Emulator
The final hurdle is an emulator with a good debugger. For a recent 48 hour gamejam I used fceux, a working build of which can be installed from the Debian repository easily with # apt install fceux. However, for the latest in cutting edge NES technology, we can install Sour’s Mesen2, which has some amazing debugging features. It’s also not supported on aarch64, but it’s another dotnet app, so we can just run it via mono right?

So instead it’s time to install dotnet. I went directly to the source and installed the Microsoft Spyware from https://dot.net/v1/dotnet-install.sh.
I had trouble piping it directly into bash from curl, so I downloaded via wget $ wget https://dot.net/v1/dotnet-install.sh And then installed both the SDK$ ./dotnet-install.sh --version latest and the runtime$ ./dotnet-install.sh --version latest --runtime aspnetcore Add dotnet to the PATH $ vim ~/.profile
...

# set PATH so it includes dotnet
if [ -d "$HOME/.dotnet" ] ; then
    PATH="$HOME/.dotnet:$PATH"
fi
#Ask dotnet not to phone-home to the MS MotherShip
export DOTNET_CLI_TELEMETRY_OPTOUT=1
Mesen isn’t purely dotnet, it also has native C++ that requires C++17 support. Clang is recommended, the default gcc provided by Debian doesn’t work.# apt install clang-13
Set clang 13 as default clang. There’s probably a proper Debian way to do this.
ln -s /usr/bin/clang-13 /usr/bin/clang
ln -s /usr/bin/clang++-13 /usr/bin/clang++
ln -s /usr/bin/clang-cpp-13 /usr/bin/clang-cpp
Clone Mesen2 source.$ git clone https://github.com/SourMesen/Mesen2
(As of 2023 March 4, Mesen2 is on commit 88c0c76. It’s possible the following changes won’t always be necessary).
Edit the makefile $ vim Mesen2/makefile Add at line 52
ifeq ($(MACHINE),aarch64)
       MESENPLATFORM := $(MESENOS)-arm64
endif
nd around line 142 change from
      cd UI && dotnet publish -c Release -r $(MESENPLATFORM) -p:OptimizeUi="true" --no-self-contained true -p:PublishSingleFile=true
      cd UI && dotnet publish -c Release -r $(MESENPLATFORM) -p:OptimizeUi="true" --no-self-contained true -p:PublishSingleFile=true
to
      cd UI && dotnet publish -c Release -r $(MESENPLATFORM) -p:OptimizeUi="true" --self-contained -p:PublishSingleFile=true
      cd UI && dotnet publish -c Release -r $(MESENPLATFORM) -p:OptimizeUi="true" --self-contained -p:PublishSingleFile=true
Finally we need to make sure the UI is built for linux-arm64.$ vim UI/UI.csproj Change line 18 from
<PropertyGroup Condition="'$(RuntimeIdentifier)'=='osx-x64' Or '$(RuntimeIdentifier)'=='osx-arm64' Or '$(RuntimeIdentifier)'=='linux-x64'">
To
<PropertyGroup Condition="'$(RuntimeIdentifier)'=='osx-x64' Or '$(RuntimeIdentifier)'=='osx-arm64' Or '$(RuntimeIdentifier)'=='linux-arm64'">
and 545 from
<Target Name="PreBuildLinux" BeforeTargets="PreBuildEvent" Condition="'$(RuntimeIdentifier)'=='linux-x64'">
To
<Target Name="PreBuildLinux" BeforeTargets="PreBuildEvent" Condition="'$(RuntimeIdentifier)'=='linux-arm64'">
The build process can then be launched from the Mesen2 root directory with $ make, resulting in a standalone executable hidden at bin/linux-arm64/Release/linux-arm64/publish/Mesen. On the first launch Mesen seemed to take a while to cache the icons used in the menus and was frozen for at least 20 seconds. But since then it has ran without problems.
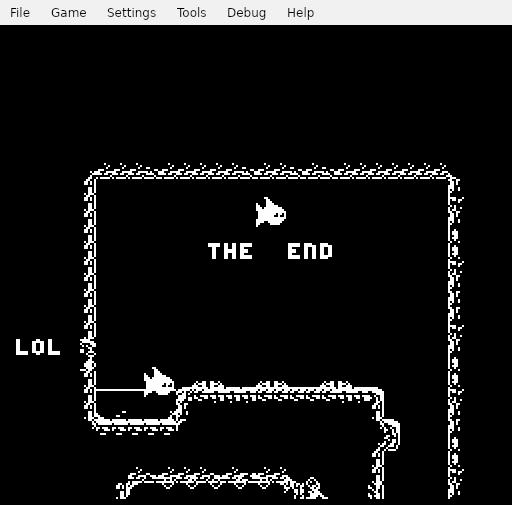
What a trek! I feel like a fish that had to climb a long and difficult series of platforms, all the while trying not to run out of oxygen, but now we have a full NES development studio on a Raspberry PI! Hopefully this will serve as a useful reference to me and perhaps even someone else someday. Thanks!